@c:\oracleDev\music.sql;
sql plus에 music sql 파일의 경로를 작성해 oracle db에 저장
SQL> desc music
 이름                                      널?      유형
 ----------------------------------------- -------- ----------------------------
 MNO                                                NUMBER
 CNO                                                NUMBER
 TITLE                                              VARCHAR2(500)
 SINGER                                             VARCHAR2(500)
 ALBUM                                              VARCHAR2(500)
 POSTER                                             VARCHAR2(260)
 IDCREMENT                                          NUMBER
 STATE                                              VARCHAR2(20)
데이터 이름과 유형에 맞게 VO를 작성
MusicVO.java
package com.sist.dao;

public class MusicVO {

	private int mno, cno, idcrement;
	private String title, singer, album, state, poster;

	public int getMno() {
		return mno;
	}
	public void setMno(int mno) {
		this.mno = mno;
	}
	public int getCno() {
		return cno;
	}
	public void setCno(int cno) {
		this.cno = cno;
	}
	public int getIdcrement() {
		return idcrement;
	}
	public void setIdcrement(int idcrement) {
		this.idcrement = idcrement;
	}
	public String getTitle() {
		return title;
	}
	public void setTitle(String title) {
		this.title = title;
	}
	public String getSinger() {
		return singer;
	}
	public void setSinger(String singer) {
		this.singer = singer;
	}
	public String getAlbum() {
		return album;
	}
	public void setAlbum(String album) {
		this.album = album;
	}
	public String getState() {
		return state;
	}
	public void setState(String state) {
		this.state = state;
	}
	public String getPoster() {
		return poster;
	}
	public void setPoster(String poster) {
		this.poster = poster;
	}

}
DBConnection.java
package com.sist.conn;

import java.sql.*;

public class DBConnection {

	private Connection conn;
	private final String URL= "jdbc:oracle:thin:@localhost:1521:XE";
	private static DBConnection dbconn;

	// 드라이버 등록
	public DBConnection()
	{
		try
		{
			Class.forName("oracle:jdbc.driver.OracleDriver");
		} catch(Exception ex) {}
	}

	// 싱글톤
	public static DBConnection newInstance()
	{
		if(dbconn==null)
			dbconn= new DBConnection();
		return dbconn;
	}

	// 연결
	public Connection getConnection()
	{
		try
		{
			conn= DriverManager.getConnection(URL, "hr", "happy");
		} catch(Exception ex) {}

		return conn;
	}

	// 해제
	public void disConnection(PreparedStatement ps)
	{
		try
		{
			if(ps!=null) ps.close();
			if(conn!=null) conn.close();
		} catch(Exception ex) {}
	}
}
DAO 기본 문장을 따로 작성해 저장
jar 파일로도 저장해 DAO 작성할 때마다 갖다 쓸 수 있도록 한다.
MusicDAO.java
package com.sist.dao;

import java.util.*;
import java.sql.*;
import com.sist.conn.*;

public class MusicDAO {

	private Connection conn;
	private PreparedStatement ps;
	private DBConnection dbConn= DBConnection.newInstance();

	// 기능 처리
	public List<MusicVO> musicListData(int cno)
	{
		List<MusicVO> list= new ArrayList<MusicVO>();

		try
		{
			conn= dbConn.getConnection();
			String sql= "SELECT mno, cno, poster, title, album, state, idcrement, singer "
					+ "FROM music WHERE cno=? ORDER BY mno ASC";

			ps= conn.prepareStatement(sql);
			ps.setInt(1, cno);
			ResultSet rs= ps.executeQuery();

			while(rs.next())
			{
				MusicVO vo= new MusicVO();
				vo.setMno(rs.getInt(1));
				vo.setCno(rs.getInt(2));
				vo.setPoster(rs.getString(3));
				vo.setTitle(rs.getString(4));
				vo.setAlbum(rs.getString(5));
				vo.setState(rs.getString(6));
				vo.setIdcrement(rs.getInt(7));
				vo.setSinger(rs.getString(8));
				list.add(vo);
			}
			rs.close();

		}
		catch(Exception ex)
		{
			ex.printStackTrace();
		}
		finally
		{
			dbConn.disConnection(ps);
		}
		return list;

	}
}
데이터에 접근하는 java 파일들을 모두 작성 했다면 웹 페이지의 프레임을 만들고 데이터를 그 프레임에 가져오는 기능을
하는 jsp 파일을 작성 한다.
1. 데이터를 삽입 할 테이블 프레임 작성
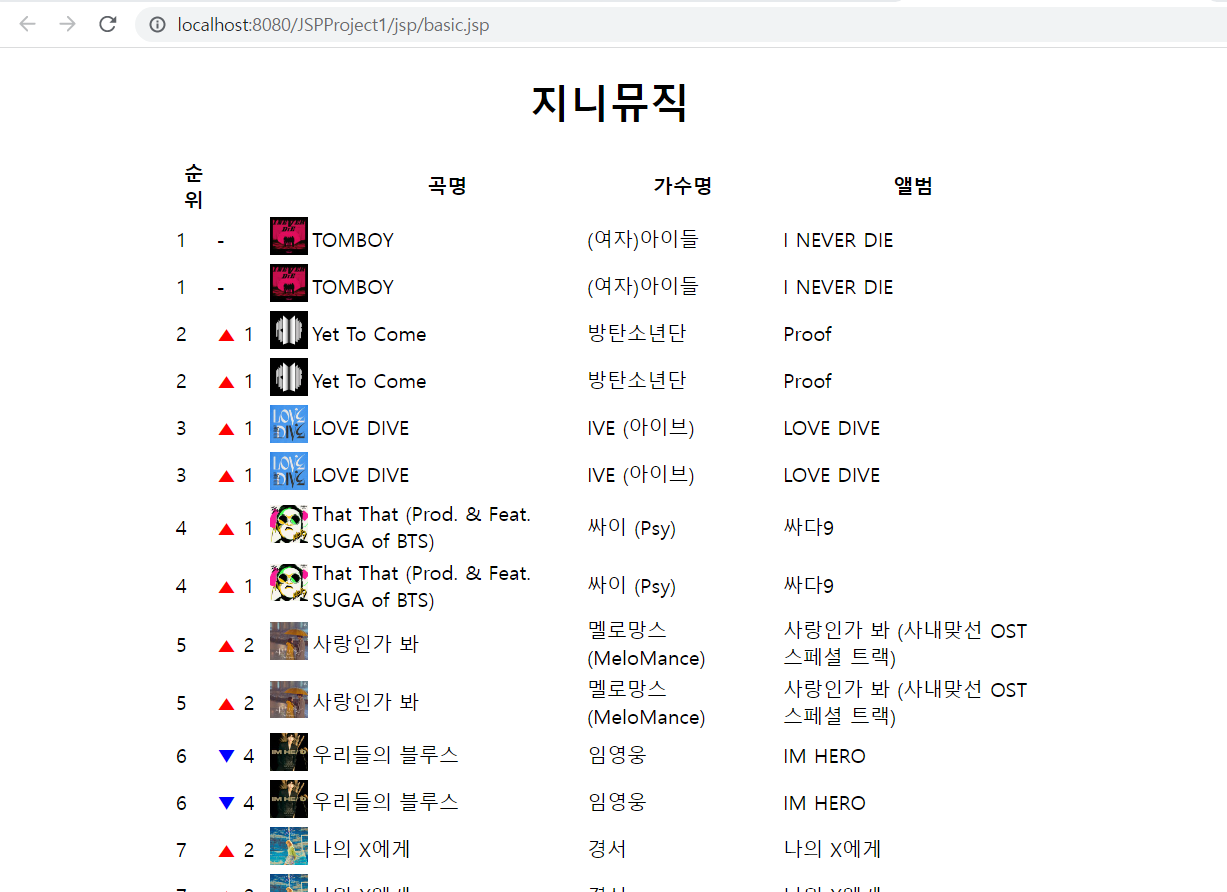
basic.jsp
<body>
   <div class="container">
    <h1>지니뮤직</h1>
    <table width=700 class="table_content">
      <tr>
        <th>순위</th>
        <th></th>
        <th></th>
        <th>곡명</th>
        <th>가수명</th>
        <th>앨범</th>
      </tr>
    </table>
  </div>
</body>
2. 순위, 포스터, 곡명, 가수명, 앨범명 출력
basic.jsp
<%
for(MusicVO vo: list)
{
%>
<tr>
<td><%= vo.getMno() %></td> <!-- 순위(mno) 출력 -->
<td> <!-- 순위 변동(state, idcrement) 출력 -->
<%
String s= "";
if(vo.getState().equals("상승"))
{
s= "<font color=red>▲</font> " + vo.getIdcrement();
}
else if(vo.getState().equals("하강"))
{
s= "<font color=blue>▼</font> " + vo.getIdcrement();
}
else
{
s= "-";
}
%>
<%=s %> <!-- s 실행 -->
</td>
<td> <!-- 포스터(poster) 출력 -->
<img src="<%= vo.getPoster() %>" width=30 height="30">
</td>
<td><%= vo.getTitle() %></td> <!-- 제목(title) 출력 -->
<td><%= vo.getSinger() %></td> <!-- 가수(singer) 출력 -->
<td><%= vo.getAlbum() %></td> <!-- 앨범(album) 출력 -->
</tr>
<%
}
%>
출력되어야 하는 "데이터 순서대로" 코드 작성
3. css 작성
basic.jsp
<link rel="stylesheet" href="../css/table.css">
<style type="text/css">
.container{
   width: 960px;
}
.table_content{
   margin: 0px auto;
}
h1{
  text-align: center;
}
</style>
table.css (../css/table.css)
@charset "UTF-8";
.table_content {
	/* 라인선 통합 */
	border-collapse: collapse;
	border-top-width: 2px;
	border-bottom-width: 1px;
	border-top-style: solid;
	border-bottom-style: solid;
	border-top-color: #333;
	border-bottom-color: #333;
}
/* th , td가 공통으로 적용되는 스타일 */
.table_content th,td{
	margin: 0px;
	/* 0px(top) 0px(right) 0px(bottom) 0px(left) => 시계방향 */
	padding: 8px;
	font-size: 9px;
}
.table_content th{
	background-color: #999;
	color: #FFF;
	border-bottom-width: 1px;
	border-bottom-style: solid;
	border-bottom-color: #333;
}
.table_content td{
	border-bottom-width: 1px;
	border-bottom-style: dotted;
	border-bottom-color: #333;
}
img{

	-webkit-border-radius:12px;
	border-radius:12px;
	/*
	   -webkit => 크롬
	   border-radius : IE
	*/
}
css 폴더 생성해 table.css 작성.
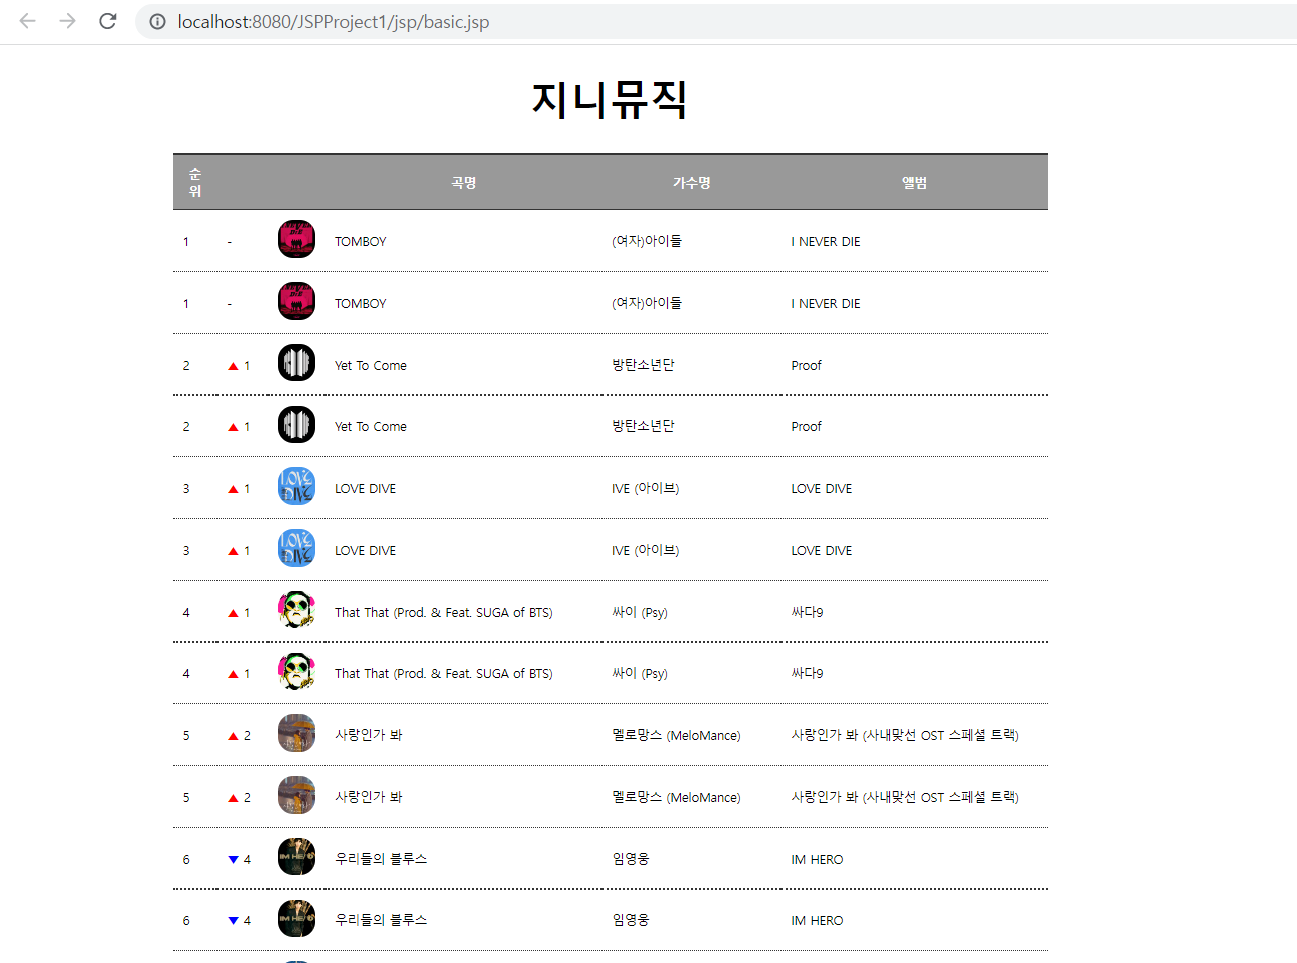
css는 적용되는 데 시간이 걸릴 수 있다.
basic.jsp [전체 코드]
<%@ page language="java" contentType="text/html; charset=UTF-8"
pageEncoding="UTF-8" import="java.util.*, com.sist.dao.*"%>
<%
MusicDAO dao=new MusicDAO();
List<MusicVO> list=dao.musicListData(1);
%>
<!DOCTYPE html>
<html>
<head>
<meta charset="UTF-8">
<title>Insert title here</title>
<!-- table.css 적용 -->
<link rel="stylesheet" href="../css/table.css">
<style type="text/css">
.container{
width: 960px;
}
.table_content{
margin: 0px auto;
}
h1{
text-align: center;
}
</style>
</head>
<body>
<!-- table 프레임 출력 -->
<div class="container">
<h1>지니뮤직</h1>
<table width=700 class="table_content">
<tr>
<th>순위</th>
<th></th>
<th></th>
<th>곡명</th>
<th>가수명</th>
<th>앨범</th>
</tr>
<!-- 데이터 출력 -->
<%
for(MusicVO vo: list)
{
%>
<tr>
<td><%= vo.getMno() %></td> <!-- 순위(mno) 출력 -->
<td> <!-- 순위 변동(state, idcrement) 출력 -->
<%
String s= "";
if(vo.getState().equals("상승"))
{
s= "<font color=red>▲</font> " + vo.getIdcrement();
}
else if(vo.getState().equals("하강"))
{
s= "<font color=blue>▼</font> " + vo.getIdcrement();
}
else
{
s= "-";
}
%>
<%=s %> <!-- s 실행 -->
</td>
<td> <!-- 포스터(poster) 출력 -->
<img src="<%= vo.getPoster() %>" width=30 height="30">
</td>
<td><%= vo.getTitle() %></td> <!-- 제목(title) 출력 -->
<td><%= vo.getSinger() %></td> <!-- 가수(singer) 출력 -->
<td><%= vo.getAlbum() %></td> <!-- 앨범(album) 출력 -->
</tr>
<%
}
%>
</table>
</div>
</body>
</html>
4. 실제 웹 사이트처럼 보이기 위한 템플릿 사용
http://codepen.io 에서 적당한 템플릿 찾아서
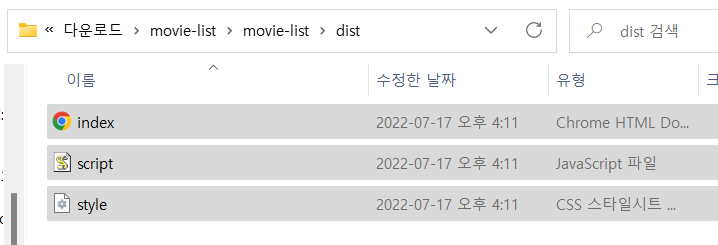
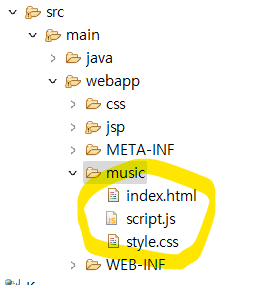
'music' 폴더를 생성하고
다운 받은 zip 파일의 dist 폴더에 있는 index.html, script.js, style.css 파일들을 복사해 music 폴더에 첨부한다.
index.html 파일을 수정해 데이터를 첨부하는 코드 작성한다. (music.jsp)
music.jsp
<%@ page language="java" contentType="text/html; charset=UTF-8"
    pageEncoding="UTF-8" import="java.util.*,com.sist.dao.*"%>
<%
    MusicDAO dao=new MusicDAO();
    List<MusicVO> list=dao.musicListData(1);
%>
<!DOCTYPE html>
<html lang="en" >
<head>
  <meta charset="UTF-8">
  <title>지니뮤직</title>
<link rel="stylesheet" href="https://cdnjs.cloudflare.com/ajax/libs/normalize/5.0.0/normalize.min.css">
<link rel='stylesheet' href='https://cdnjs.cloudflare.com/ajax/libs/font-awesome/4.7.0/css/font-awesome.min.css'><link rel="stylesheet" href="./style.css">

</head>
<body>
<!-- partial:index.partial.html -->
<header>

</header>

<section></section>

<template id="movie-template">
 <%
   for(MusicVO vo:list)
   {
 %>
  <figure>
    <img src="<%= vo.getPoster() %>" />
    <figcaption>
      <p><%=vo.getTitle() %></p>
      <div class="rating">
        <i class="fa fa-heart"></i>
        <h4><%=vo.getSinger() %></h4>
      </div>
    </figcaption>
  </figure>
  <%
   }
  %>
</template>
<!-- partial -->
<script src='https://cdnjs.cloudflare.com/ajax/libs/jquery/3.2.1/jquery.min.js'></script>
<script src='https://cdnjs.cloudflare.com/ajax/libs/mustache.js/2.3.0/mustache.min.js'></script><script  src="./script.js"></script>

</body>
</html>

프로젝트에는 이 방법을 적용해야 할 듯.
궁금한 점
jsp 파일 코드 상단에 항상 위치하고 있는
<%
    MusicDAO dao=new MusicDAO();
    List<MusicVO> list=dao.musicListData(1);
%>
뭘 import 하는 걸까
musicListData(1)은 cno 같은데 왜 cno를 import 할까
'output > JSP' 카테고리의 다른 글
| [수업] 망고 플레이트 구현(로그인 유무에 따른 변화, 로그인, 카테고리 출력) (0) | 2022.07.21 |
|---|---|
| [수업] 망고플레이트(카테고리, 상세보기) 구현 (0) | 2022.07.18 |
| 웹 사이트 만들기 4강 프레임워크로 디자인 틀 잡기 (0) | 2022.07.11 |
| [FINAL]게시판 만들기 14강 게시판 메인 페이지 제작 (0) | 2022.07.10 |
| 게시판 만들기 13강 글 삭제 기능 (0) | 2022.07.10 |